| Click here to view or download a PDF file of this guide |
| Click here to view a video guide on how to create a Report upload rule |
The ‘Report Zone’ enables Reports created in your school’s MIS to be uploaded to ClarionCall, and displayed in the Parent Message Centre. Parents will only be able to view reports for their children.
Before they are published in ClarionCall, pupil’s reports must be written in your school’s MIS, these reports will have the pupil’s name and ID assigned to them. ClarionCall provides a script that will upload the reports to our servers. To publish these, a rule needs to be created in the Report Zone, which will publish any reports that obey that rule.
Once this rule has been created, and the Reports uploaded, any changes made to an uploaded report in your MIS will automatically update in ClarionCall.
Click here for details on how to upload an individual report, click here for details on how to email reports to parents, and click here for details on how to delete a report
How to create a Report upload rule
1. Ensure you are logged into the Staff Message Centre
2. Click ‘Setup’ panel list item in the Report Zone on the Dashboard.
3. The Reports Setup page will load.
4. In the ‘Publication’ section, use the drop-down menu to select the ‘Group’ for which Reports are to be uploaded.
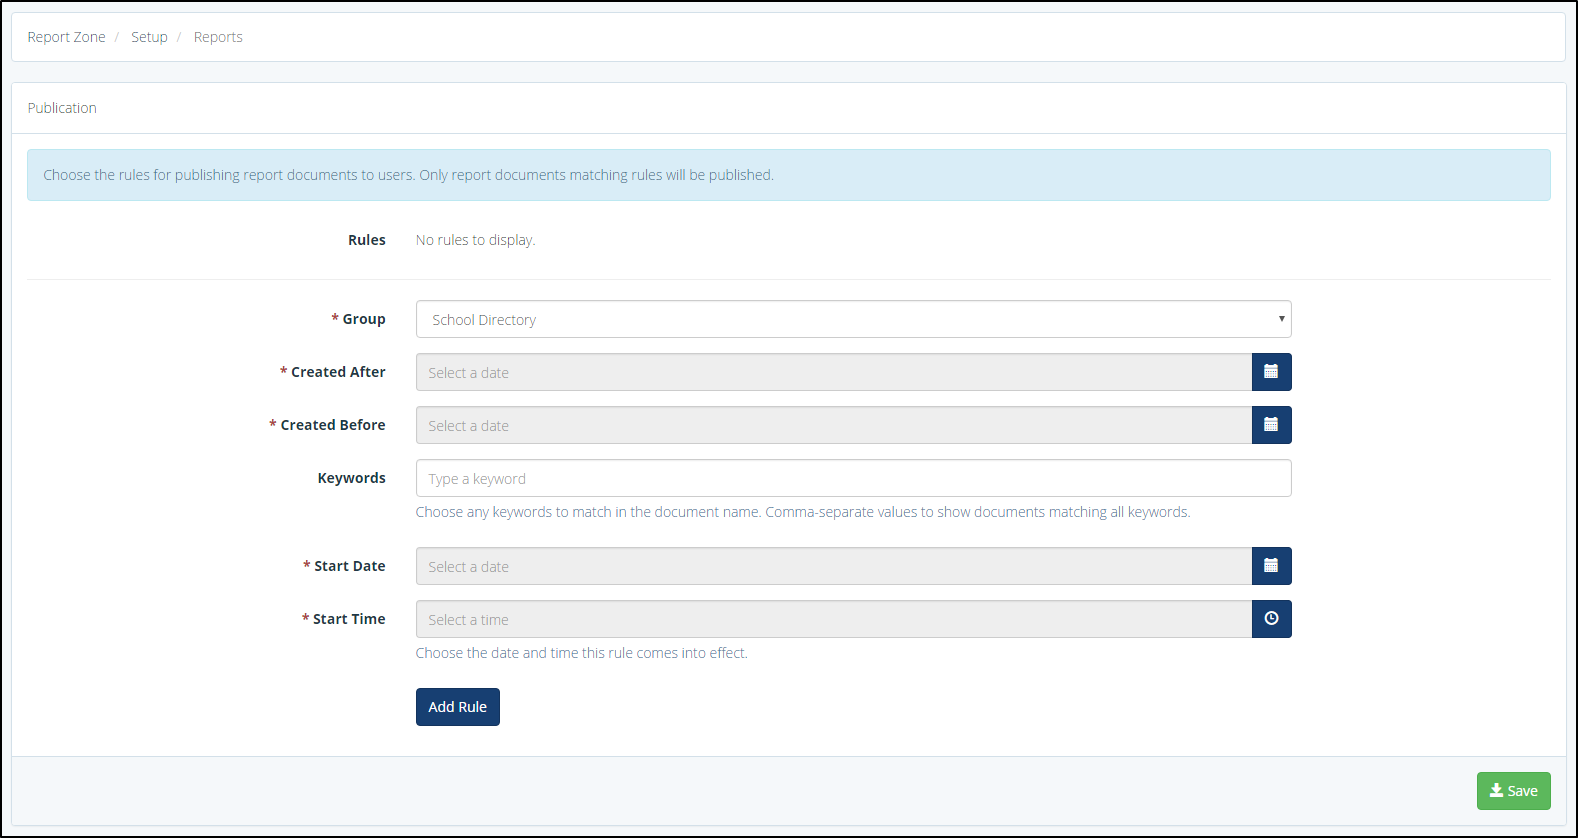
The Reports Setup page 'Publication' section
5. Select the ‘Created After’ date. This date should correspond to the date the report was uploaded to ClarionCall, NOT the date that the report was initially created in your MIS.
6. Select a ‘Created Before’ date. Setting the ‘Created After’ and ‘Before’ dates sets a date range stating which Reports should be displayed. Any Reports uploaded outside of these dates will not be displayed unless an additional rule is created.
7. Enter keywords to help define which Reports should be brought through e.g. Summer Term 2016 Reports. This should partially match the file name, e.g. if your reports are titled ‘*pupil name*-Summer Report 2016’, then entering the keywords ‘Summer Report 2016’ would bring through all pupil reports
8. Enter the Start Date and Time – these details will set when the Reports are displayed and able to be viewed by parents.
9. Once all of these details have been entered, click ‘Add Rule’ to create the Report upload rule.
10. Click ‘Save’ once your Report upload rule has been created.
Once uploaded and published, Reports will display in the ‘Latest’ section in the Report Zone, in the Parent Message Centre. Here, parents are able to view and download their children’s Reports.
Archive
The ‘Archive’ section of the Reports Setup page allows for Reports created before a certain date to be Archived.
1. In the Reports Setup page, scroll down to the ‘Archive’ section.
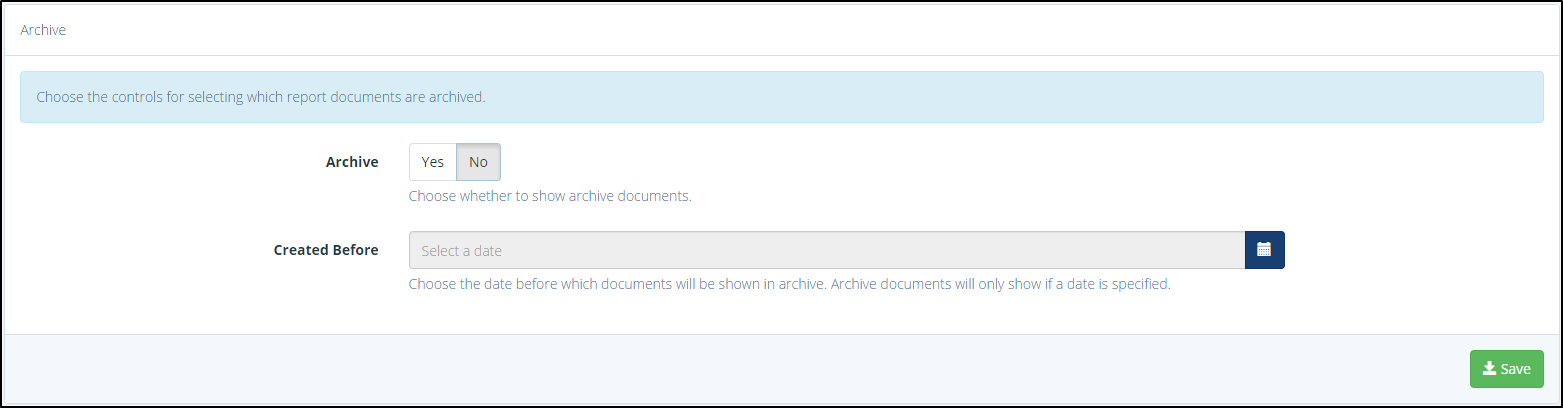
The Reports Setup ‘Archive’ section
2. Choose to display archived documents by clicking ‘Yes’.
3. Select a ‘Created Before’ date using the calendar drop-down. Reports created before this chosen date will display in the ‘Archive’ section in the Reports Zone in the Parent Message Centre. Parents will still be able to download these Reports.
4. Click ‘Save’ after making any changes.


