| Click here to view or download a PDF file of this guide |
| Click here to view a video guide on creating an Invitation Club |
| Click here to view a video guide on editing an Invitation Club |
An Invitation Club is one that staff add attendees to themselves, and is not opened for booking. Before creating an Invitation Club, you will need to set up Club Categories. Examples of categories could be ‘After-School Clubs’, or ‘Music Clubs’.
To create an Invitation Club Category
1. Ensure you are logged into the Staff Message Centre.
2. Click ‘Invitation Clubs’ in the Co-Curricular Zone.
3. Click ‘Categories’ in the left-hand menu.
4. Type the Category title, select a Calendar Category if appropriate, and select a general form if appropriate.
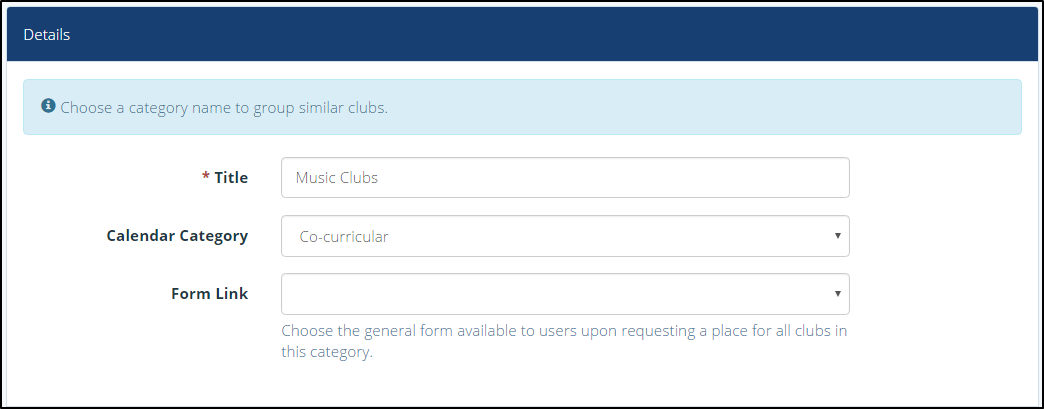
The Invitation Club Category setup page
5. Click ‘Save’ once these details have been entered.
To create an Invitation Club
1. Ensure you are logged into the Staff Message Centre.
2. Click ‘Invitation Clubs’ in the Co-Curricular Zone.
3. Click the ‘+New’ icon in the right-hand corner.
4. Enter the Club’s title; select the appropriate Club Category, and the correct school term. (Term information is entered separately, click here for further details).
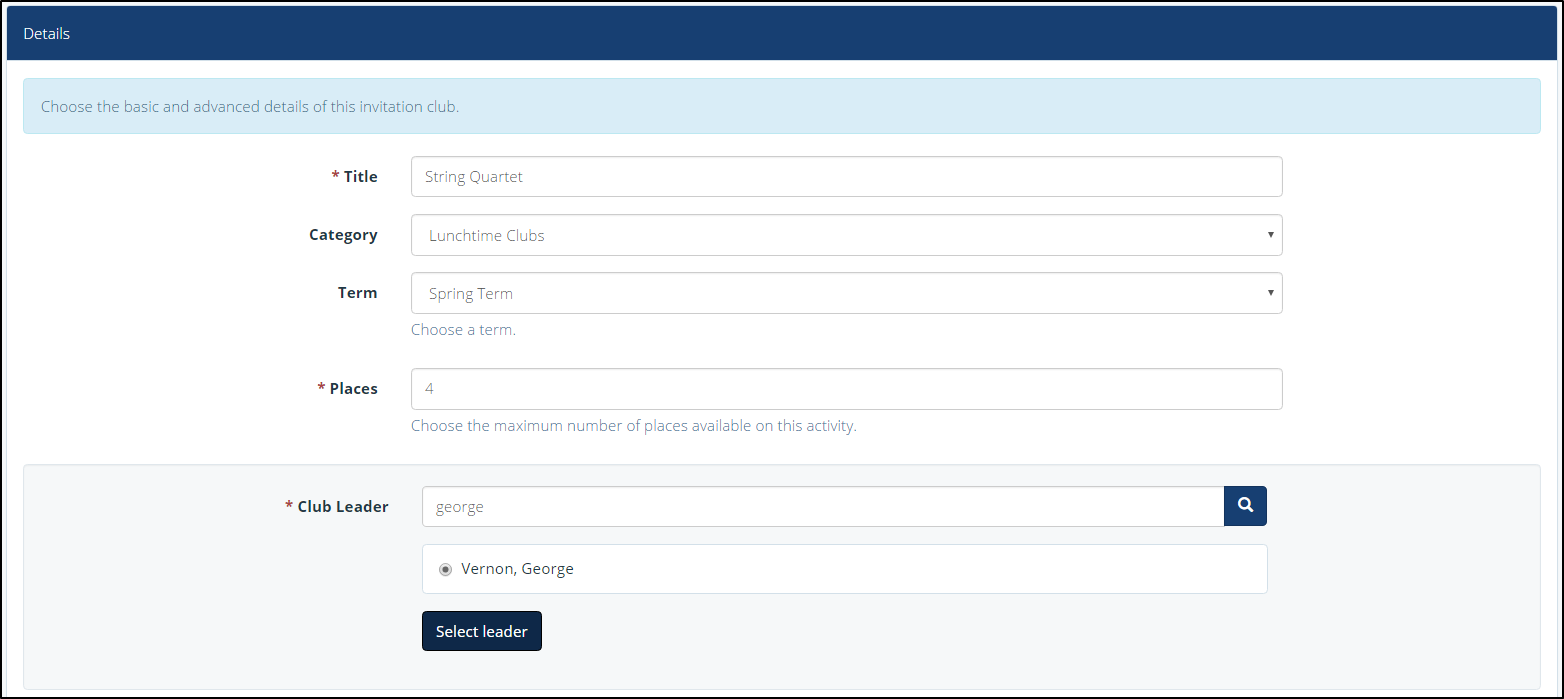
The Create Invitation Club page
5. Enter the number of places the Club holds, and use the search bar to select the Club’s leader. (The club leader should be a member of school staff in ClarionCall).
6. Type a description of the Club, and if applicable enter the cost.
7. Once you have entered the appropriate details, click ‘Submit’.
Clicking Submit creates the ‘shell’ of your Invitation Club, the basic details are saved, and it can now be edited and refined.
To edit an Invitation Club
1. Click the ‘Options’ button and click ‘Edit Club’.
2. The ‘Basic’ section will display the details you have previously entered. A ‘Status’ option will display, it is best to keep the status set as ‘Draft’ until all Club details have been entered and saved. If necessary, edit any details in the ‘Basic’ section and click ‘Save’.
3. Scroll down to the ‘Advanced’ section, and attach a file if required. This can contain further information regarding the Club.
4. Club Sessions need to be created before adding Club attendees.
a. To add Club sessions, scroll down to the ‘Sessions’ section.
i. Either add each session individually by select the appropriate date and start and end times and clicking ‘Add Session’.
ii. Or, Click ‘Range of Sessions, enter the date range, select the correct weekday and enter the start and end time and click ‘Add Sessions’. This will create a session for the selected weekday throughout the date range selected at the same time. Once your sessions are created, click ‘Save’.
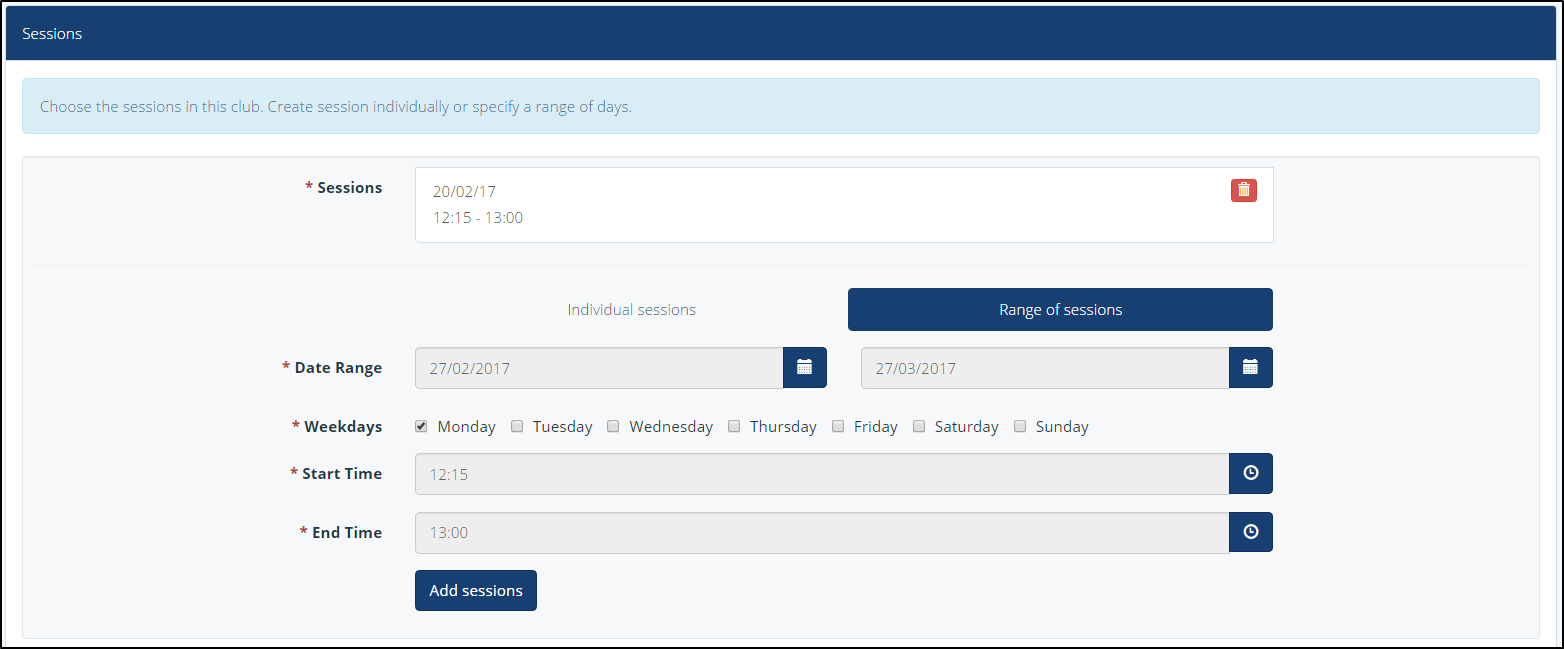
The Invitation Club Sessions section
5. Once you have created your Club Sessions, you can select the appropriate pupils in the ‘Attendees’ section. Scroll up to the ‘Attendees Section’, and click ‘Manual Select’, and use the filter options to find the correct pupils. Click their names to move them to the ‘Selected Members’ column, then click ‘Save’ once selected.
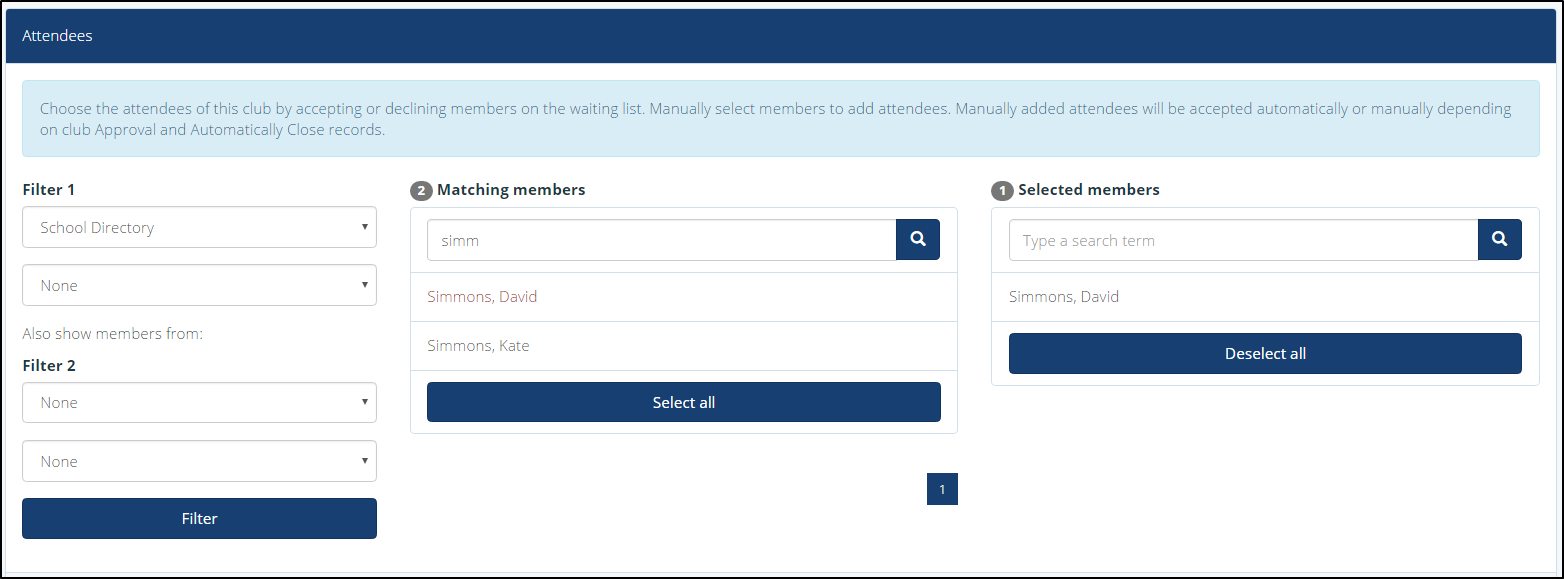
The invitation Club Attendees section
6. Once you have entered the appropriate details, and selected the correct pupils, you can publish the Club. There are two ways this can be done, either scroll to the top of the ‘Edit’ page, click the ‘Published’ button, and save. Or, in the ‘Invitation Clubs’ page, tick the tick-box for the correct club, click ‘Bulk’, and click ‘Publish Club and Sessions’.


