| Click here to view or download a PDF file of this guide |
| Click here to view a video guide to creating a Singular Club |
| Click here to view a video guide on editing a Singular Club |
A Singular Club is one that allows parents to book individual sessions for their child. Before creating a Singular Club, you will need to set up Club Categories.
To create a Singular Club Category
1. Ensure you are logged into the Staff Message Centre.
2. Click ‘Singular Clubs’ in the Co-Curricular Zone.
3. Click ‘Categories’ in the left-hand menu.
4. Type the Category title, select a Calendar Category if appropriate, and type a Form Comment.
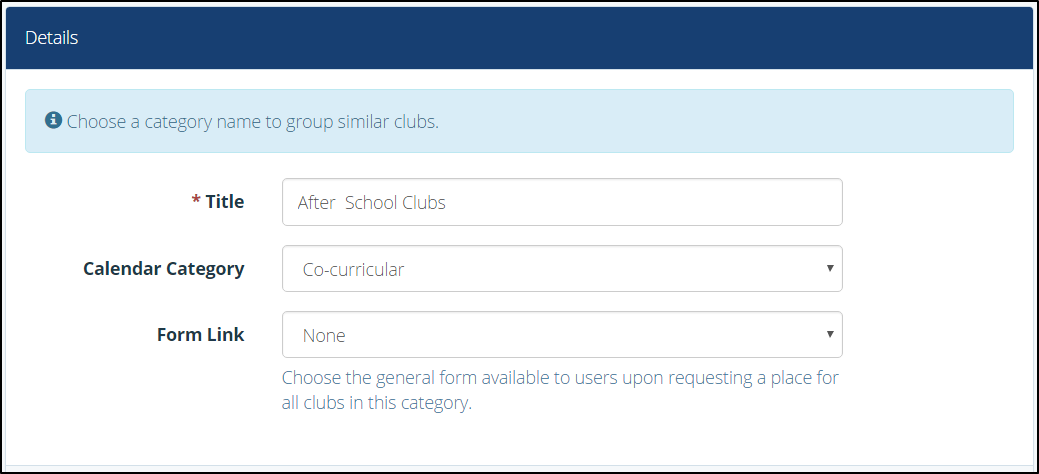
The Singular Clubs Category setup page
5. Click ‘Save’ once these details have been entered.
To create a Singular Club
1. Ensure you are logged into the Staff Message Centre.
2. Click ‘Singular Clubs’ in the Co-Curricular Zone.
3. Click ‘Clubs’ in the left-hand menu, and click ‘+New’.
4. Enter the Club’s title; select the appropriate Club Category, and the correct school term. (Term information is entered separately, click here for further details).
5. Enter the number of places the Club holds, choose whether you wish to automatically approve pupil places, or manually decide this, and whether the Club should automatically close once all places have been filled.
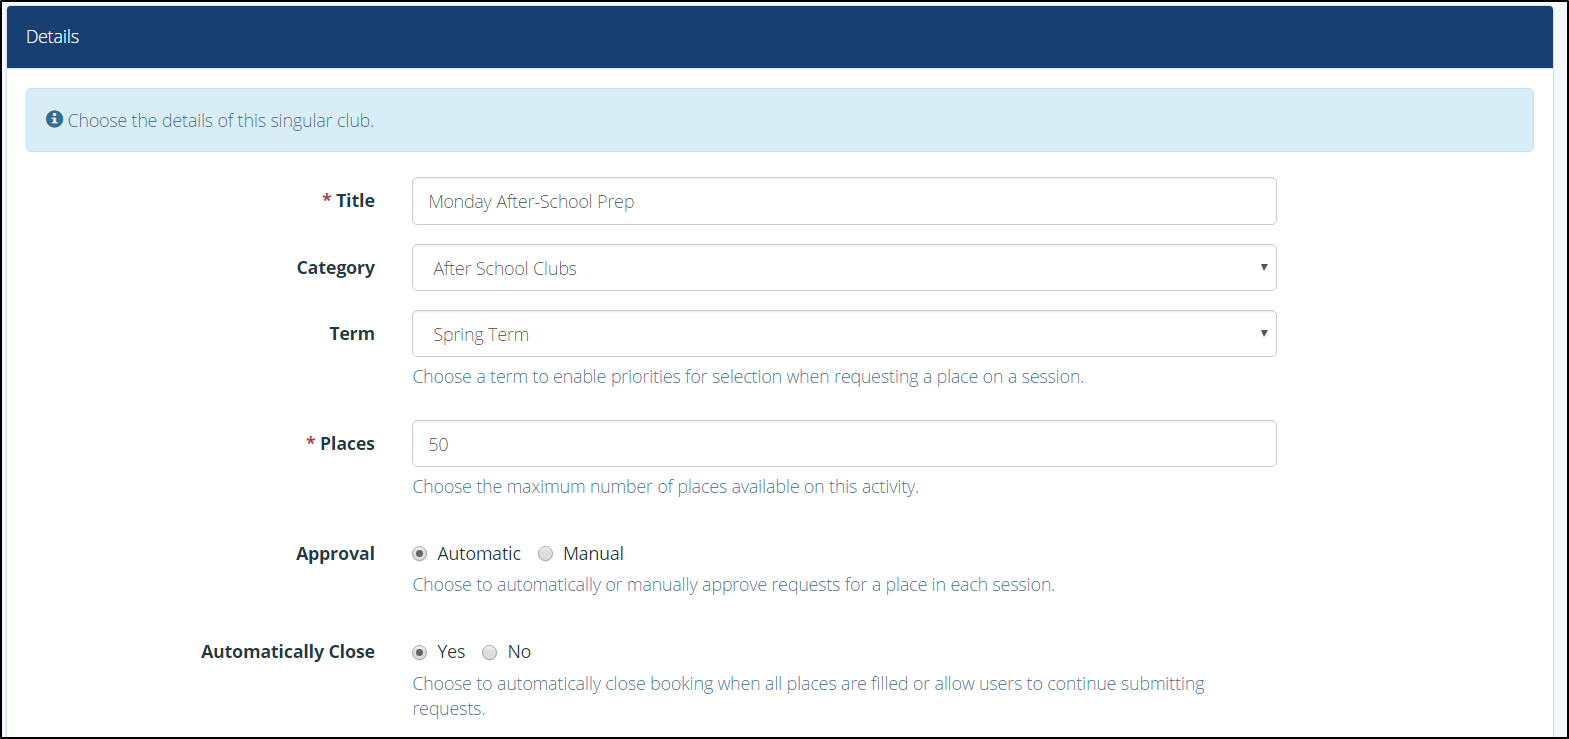
The Singular Club ‘Details’ section
6. Use the search bar to select the Club’s leader.
7. Type a description of the Club, and if applicable enter the cost.
8. Once you have entered the appropriate details, click ‘Submit’.
To edit a Singular Club
1. Click ‘Options’ and click ‘Edit Club’.
2. The ‘Basic’ section will contain the details you have previously entered. A ‘Status’ and a ‘Booking’ option will display, it is best to keep the status set as ‘Draft’ until all Club details have been entered and saved. Booking can be set to automatically open and close on a certain date and time, click ‘Timed’ in the booking field.
a. Select the booking open date and time.
b. Select the booking close date and time.

The ‘Timed’ booking feature
Click 'Save' after editing any details.
3. Scroll down to the ‘Advanced’ section. Upload an attachment file if required (this can contain further information about the Club). If the Club requires confirmation of terms and conditions, select the ‘Yes’ option, and upload a confirmation file that must be read and acknowledged before a Club place can be requested. Click ‘Save’ after uploading any documents.
4. To add Club session dates, scroll to the ‘Sessions’ section.
a. Choose whether to tell parents the true status of their request by clicking ‘Yes/No’ for the ‘Reveal’ option.
i. Either add each session individually by select the appropriate date and start and end times and clicking ‘Add Session’.
ii. Or, Click ‘Range of Sessions, enter the date range, select the correct weekday and enter the start and end time and click ‘Add Sessions’. This will create a session for the selected weekday throughout the date range selected at the same time.
iii. Once your sessions are created, click ‘Save’.
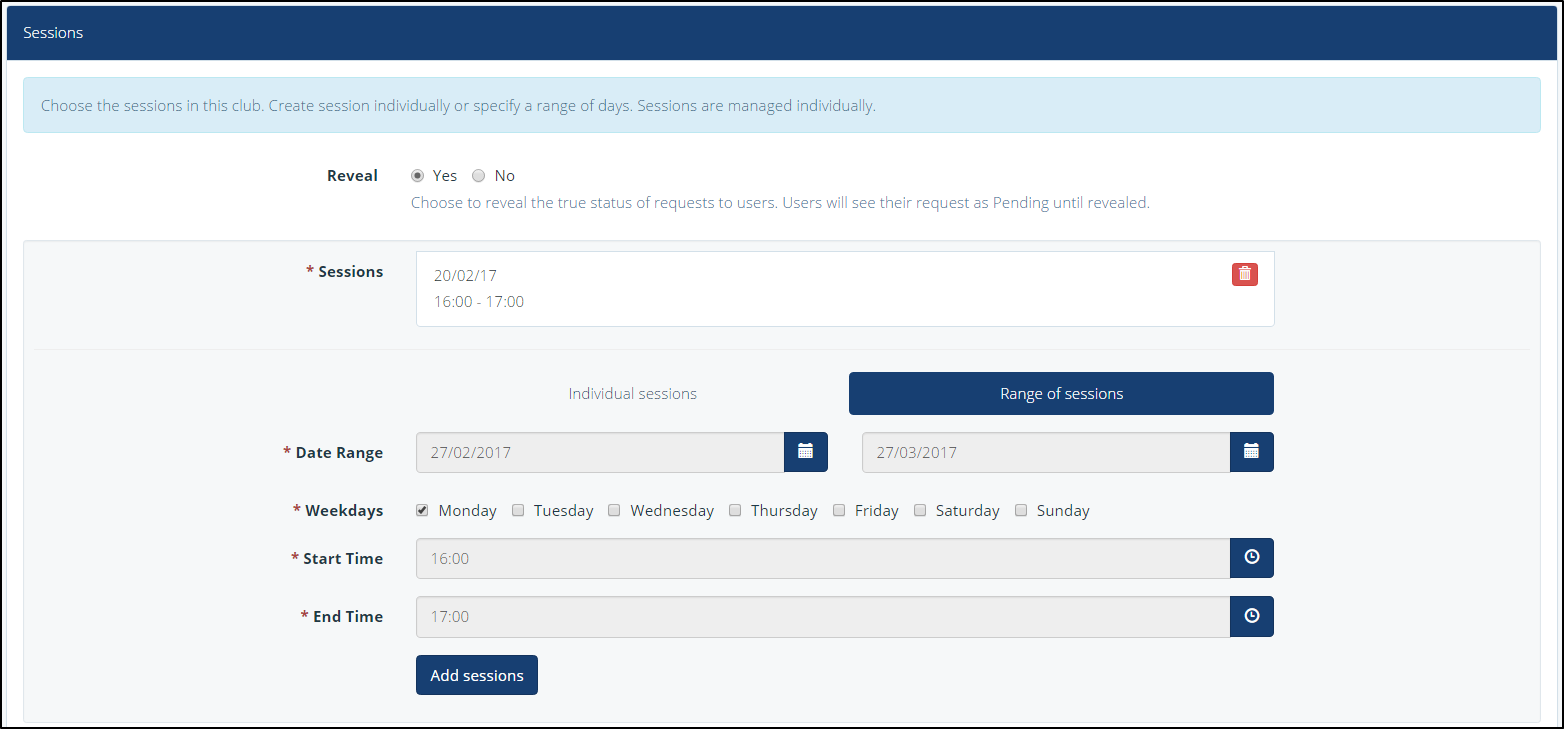
The Singular Club ‘Sessions’ section
5. Scroll down to the ‘Availability’ section; select the correct academic ‘Availability’ year, and then the appropriate year group(s). Click ‘Add Group’ after selecting a year group. Repeat as necessary.
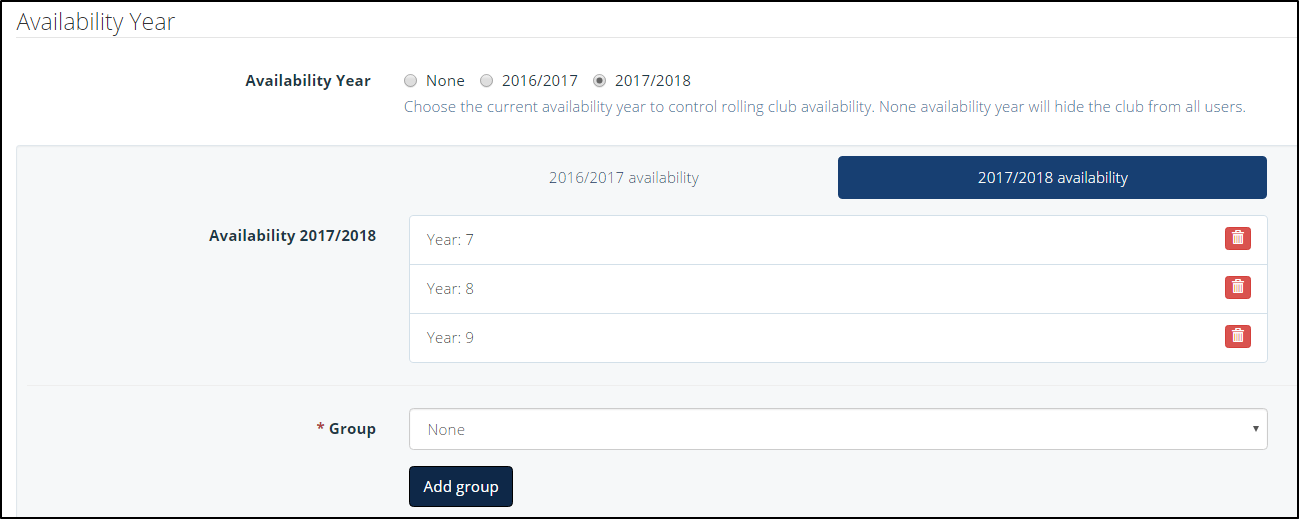
The Singular Club ‘Availability section
6. The ‘Head Start Booking’ section enables booking to be opened for selected parents ahead of the rest. Selecting ‘Open’, saving and the refreshing the page will display the search bar enabling you to select parents to open the booking early for. Click ‘Save’ after selecting parents.

The Singular Club ‘Head Start Booking’ section
7. Once you have entered the appropriate details, and selected the correct pupils, you can publish the Club. There are two ways this can be done, either scroll to the top of the ‘Edit’ page, click the ‘Published’ button, and save. Or, in the ‘Singular Clubs’ page, tick the tick-box for the correct club, click ‘Bulk’ and click ‘Publish Club and Sessions’.
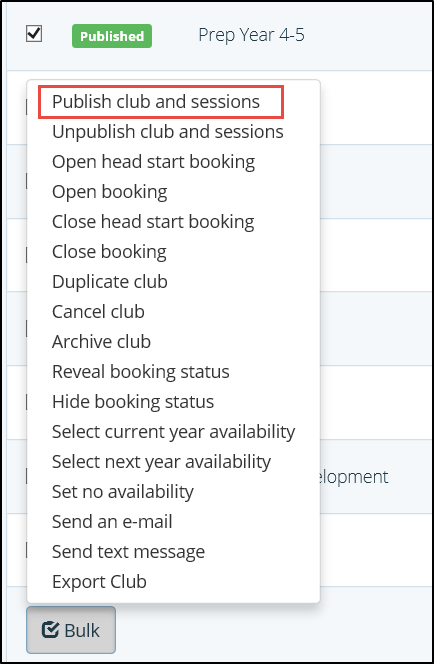
The Singular Clubs Bulk menu
8. Once the Club has been published, if you have not used the ‘Timed’ booking feature, Club booking can be opened by ticking the appropriate tick-box, clicking ‘Bulk’ and clicking ‘Open Booking’. Alternatively, click ‘Options’ and then ‘Edit Club’, in the ‘Basic’ section, tick ‘Open’ in the ‘Booking’ field and save.


