Once an extended community group has been setup, it is possible to upload contact data through your ClarionCall system.
To load extended community data, perform the following:
1. Create a .csv file containing your extended community contact records. Contact records must comply with the following format:
- Column A: forename (mandatory)
- Column B: surname (mandatory)
- Column C: e-mail address (mandatory if mobile number is not present)
- Column D: mobile number (mandatory if e-mail address is not present)
- Column E: group specific notes
- Column F: school notes
- Column G: home address
- Column H: home phone
2. Once your extended community data .csv file has been created, go to the ‘Admin’ screen.
3. Click the “Load Community” button.
4. The system will now display the ‘Upload Community’ screen, which lists the required format for your community data .csv file, an area to perform a test upload and an area to perform a live upload.
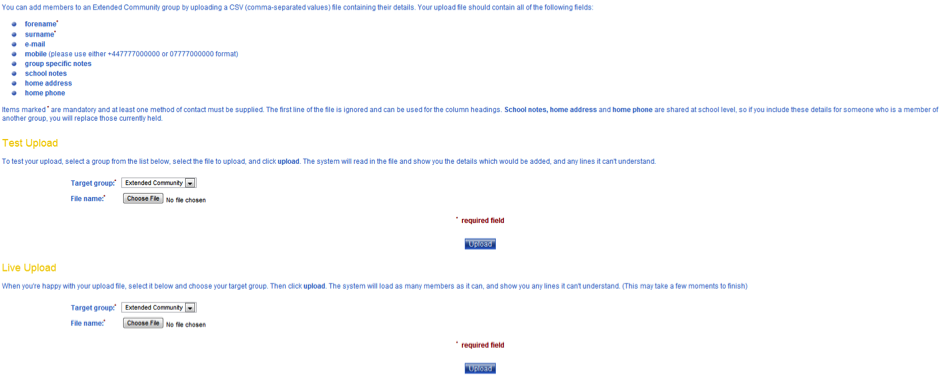
5. There are two different upload methods for a community:
- A test upload will produce an on-screen report of the additions/modifications that would be made if a live upload was performed. A test upload will not upload data to your system, but is a useful mechanism to discover any issues with your data and to understand what would occur during a live upload.
- A live upload will upload data onto your system. It is recommended that you perform a test upload and once satisfied with the results, complete a live upload.
6. To perform a test upload, complete the following:
- Under the ‘Test Upload section, select the target extended community group from the relevant drop down menu. Click the “Choose File” button.
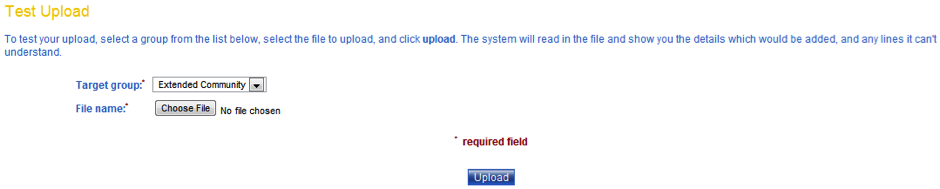
- Navigate to the .csv file created in step 1 and click “Open”. The file name will appear next to the “Choose File” button.

- Click “Upload” to produce the on-screen report.
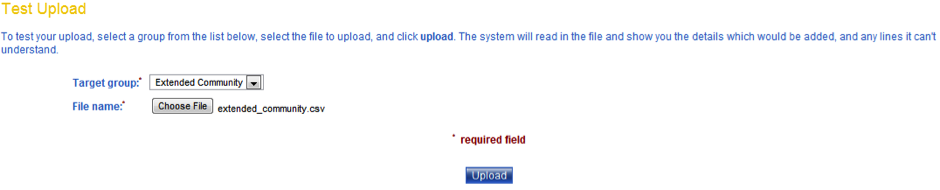
- The system will now display an on-screen report of the changes that would be made if a live upload is completed with the same data. The report consists of:
- New Users – any new users that would be added to the extended community.
- Existing Users – details of any members that already exist in your ClarionCall system (in a different group) and will be added to the selected extended community.
- Failed Entries – any entries that were not uploaded due to an error. A descriptive reason is provided.
7. Once you have completed a test upload and are satisfied with the produced results, you can perform a live upload by:
- Under the ‘Live Upload’ section, select the target extended community group from the relevant drop down menu. Click the “Choose File” button.
- Navigate to the .csv file created in step 1 and click “Open”. The file name will appear next to the “Choose File” button.
- Click “Upload” to complete the live upload process.

- The system will display an on-screen report of the upload results.


