| Click here to view or download a PDF file of this guide |
Items added in the Facility Zone can be used for any school event, helping to organise what additional equipment is needed and when.
• The ‘Catering’ tab allows refreshment and snack requirements to be added.
• The ‘Transport’ tab allows vehicles to be added.
• The ‘Resources’ tab enables additional equipment requirements to be added.
• The ‘Estate’ tab allows event venues to be added.
How to create a Facility option
In order to assign a facility option to an event, it must first be added to the correct menu option with the Facility Zone. Instructions on how to do so are below:
1. Ensure you are logged into the Staff Message Centre
2. Click ‘Catering’ in the Facility Zone on the Dashboard. This will open the Catering facility option. Click ‘Transport’, ‘Resources’, or ‘Estate’ to add facilities under these options.
3. To add Facility items:
a) Catering – Click ‘Inventory’. Click ‘+New’, enter the title (e.g. ‘Match Teas’), a shorthand code, the cost, and a quantity limit. Click ‘Save’.
b) Transport – Click ‘Fleet’. Click ‘+New’, enter the title (e.g. Minibus 1), a shorthand code and the cost. Click ‘Save’.
c) Resources – Click ‘Inventory’. Click ‘+New’, enter the title (e.g. Tackle Bags), a shorthand code, the cost, and a quantity limit. ‘Click ‘Save’.
d) Estate – Click ‘Venues’. Click ‘+New’, enter the title (e.g. Astroturf Pitch 1), a shorthand code and the cost. Click ‘Save’.
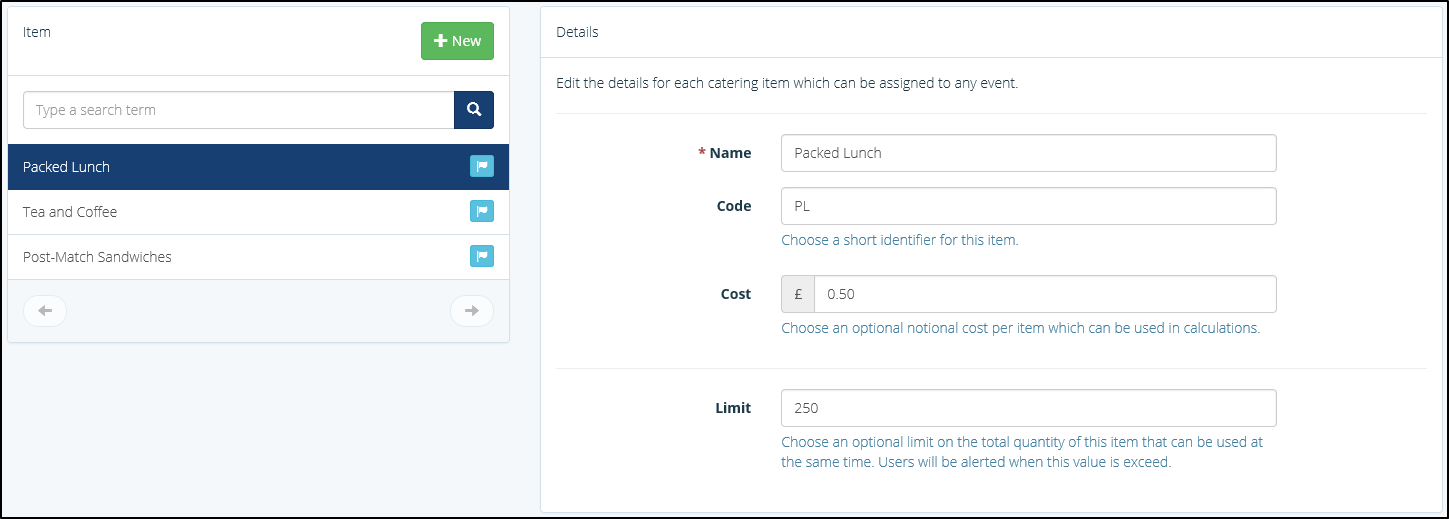
The Facility Zone 'Catering' Inventory page
Once created, Catering, Transport, Resources and Estate options can be added to any school Event, Sports match, Parents’ Evening, and Co-Curricular Club session.
Any requested facilities can be viewed in the Facility Zone. Simply click the appropriate Facility option (Catering, Transport, Resources or Estate), and click ‘Requests’.

The Facility Zone 'Catering' Requests page
Additionally, a list of required Facilities can be exported into a spreadsheet and downloaded. When in the appropriate Facility option, click ‘Export’, select the required fields, a start and end date, and a file format, and click ‘Export’.


