| Click here to view or download a PDF file of this guide |
Once registered, users of the Staff and Parent Message Centre’s are able to log-in and change the contact details assigned to their account. Once any changes have been made, users will be unable to make further changes until their initial changes have been checked by a school administrator.
It is necessary to check these profile changes, as they have been designed to act as a prompt to update any out-of-date details within your MIS. Any updated contact details will not be automatically reflected in ClarionCall, however, once updated in your MIS, any changes will be synchronised through to ClarionCall overnight.
How to process user profile changes
1. Ensure you are logged into the Staff Message Centre.
2. In the Navbar at the top of your screen, click ‘Administration’.
3. Click ‘Profiles’ in the left-hand menu. An alert badge will display, informing you of the number of ‘Outstanding Submissions’ from users.

The ‘Outstanding Profile Submissions’ alert badge
4. As a default, outstanding submissions from the past 14 days will display, this view can be changed by using the drop-down menus to select the number of days, or status of submission. Alternatively, use the search bar option to search for a specific user. An outstanding submission will display in amber, with details regarding which Message Centre has been updated, the date submitted, number of changes, and status also displaying.
5. To view the changes made, click the ‘i’ (More) icon on the right-hand side for the appropriate user.
![]()
The ‘More’ Icon
6. Any updates will be underlined; any underlined details should be checked in your MIS to ensure your contact information is up-to-date. The ‘Basic’ tab contains immediate contact information (name, phone numbers, e-mail address), the ‘Detail’ tab contains the user’s address, and the ‘Related’ tab shows the pupil related to the user. Any additional comments will display in the ‘Submission Comment’ field. Once you have checked the changes, click ‘Close’ to go back to the outstanding submissions page.
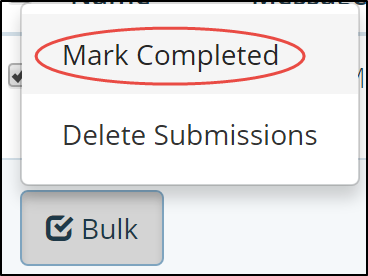
7. Once you have actioned any changes, the submission can be marked as complete. Tick the tick-box next to the user’s name, click ‘Bulk’ at the bottom of the screen, and click ‘Mark Completed’. This can be done for multiple submissions if necessary.

The ‘Mark Completed’ Bulk option
8. Once marked as completed, you can still view the submission by using the drop-down menu to show ‘Completed’ submissions. The user’s name will have turned green.


