To send an e-mail to a particular group, perform the following:
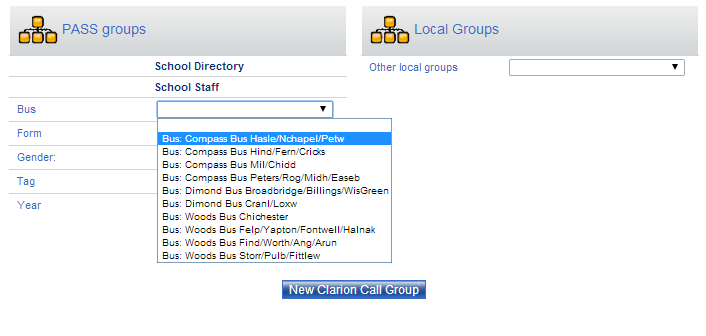
1. Select the recipient group from the “Message” screen by clicking on the group name. Note: The “School Directory” group contains all parent and pupil data for the School, but does not contain School Staff (unless they are also listed as a parent at the School) or extended community group members.
2. Click “Send An E-Mail”.
3. The system will now display the “Send An E-Mail” screen.
- Select your recipients. By default the system will send the e-mail to all contacts in the group (both primary and secondary). If you would like to send an e-mail to every group contact continue to step 3.4. If you would like to send an e-mail to primary contacts only, select the “Primary Contacts only” option.
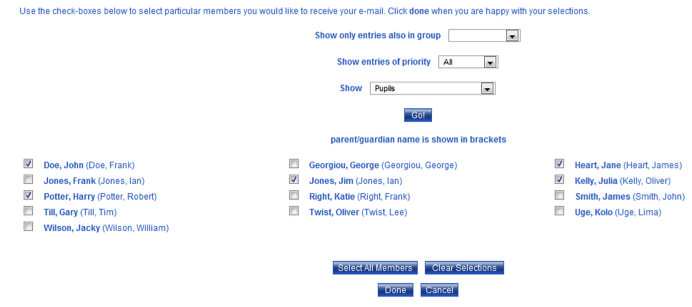
- If you would like to send an email to a selection of group contacts, click the “Select” option.

- The system will display a list of the contacts in this group. Select your intended recipients by checking the box next to the relevant name and click “Done”.
- If you would like to send a copy of this e-mail to an address that is not listed within this group, it is possible to enter the required e-mail address in the 'Cc:' field. Multiple address can be entered but must be separated by a semi-colon ‘;’.

- The “Reply to:” option allows you to specify an e-mail address to which replies should be sent. By default replies will be sent to the School’s e-mail address (which is set in the “Edit School” screen of the ‘Admin’ section.
If you would like replies to be sent to the address associated with your logged-in ClarionCall account, select the “Me” option.
Alternatively it is possible to specify a different ‘reply to’ address by manually entering the e-mail address into the “This address:” text field.
Note: the “Reply to” address should be an e-mail that is checked regularly, as parents often ‘reply’ to an e-mail with important messages expecting that they will be read.
- Enter the subject of your e-mail in the “Title” text field. This field is mandatory.

- If your School has not purchased additional e-mail templates, continue to step h. If ClarionCall have designed multiple e-mail templates for your School then select the template name from the “Template” drop down menu.
This drop down menu will not be visible if your School has not purchased additional e-mail templates.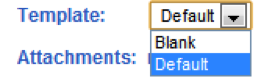
- To attach a file to your e-mail, click the “Change” button. It is possible to add multiple attachments of up to 3Mb per e-mail, although it is recommended that the total is below 2Mb as many corporate systems block e-mails with overly large attachments.
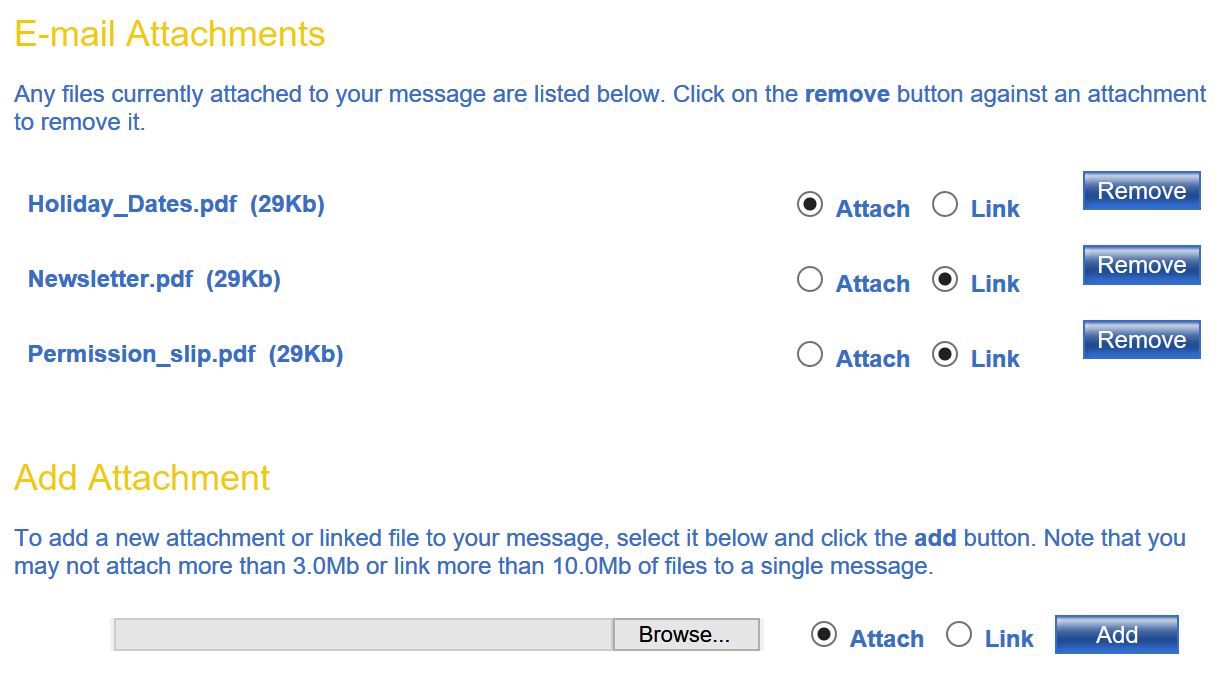
- The system will now display the “E-mail Attachments” screen (see right). The top of the screen lists any attachments already associated with this e-mail.
Files can now be added to an email in one of two different ways - as a conventional attachment sent with the email (click the 'Attach' button) or as a link within the email where the recipient clicks the link to download each file (click the 'Link' button) You can attach and/or link as many files as you want subject to a total of 3Mb for attached files and a total of 10Mb of linked files.
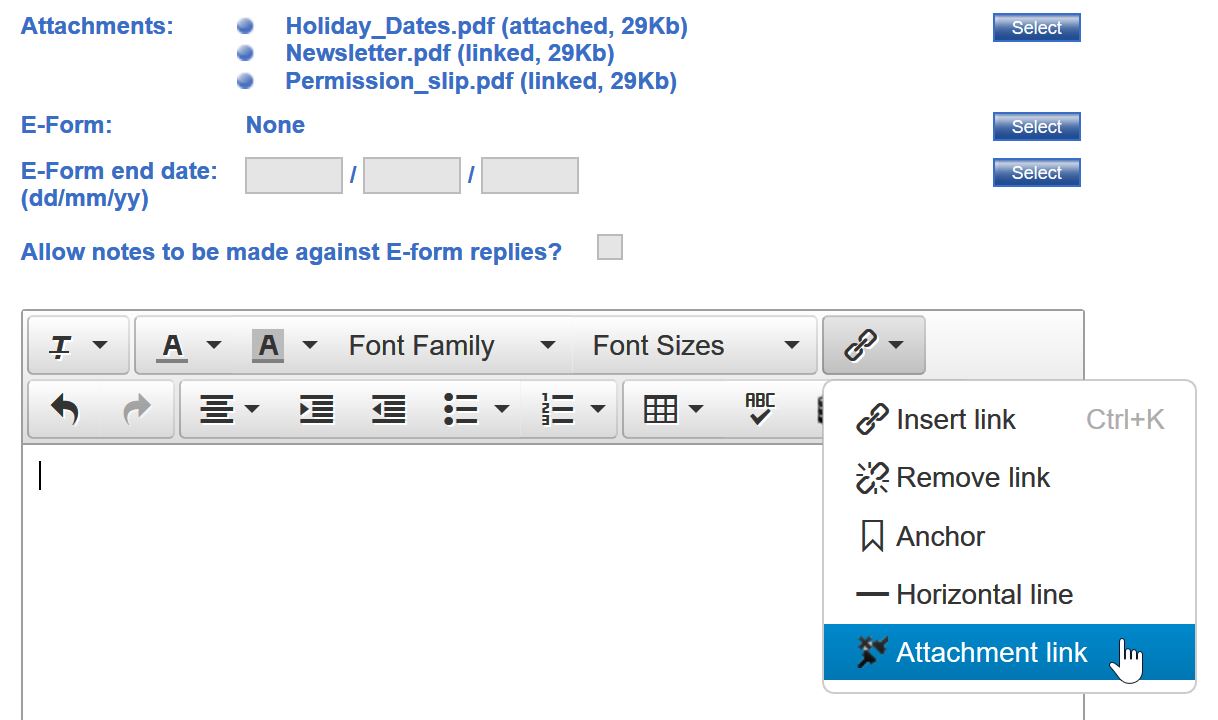
If you chose to link one or more files, once they are uploaded, you must use the link icon (see left) to create a link for each file.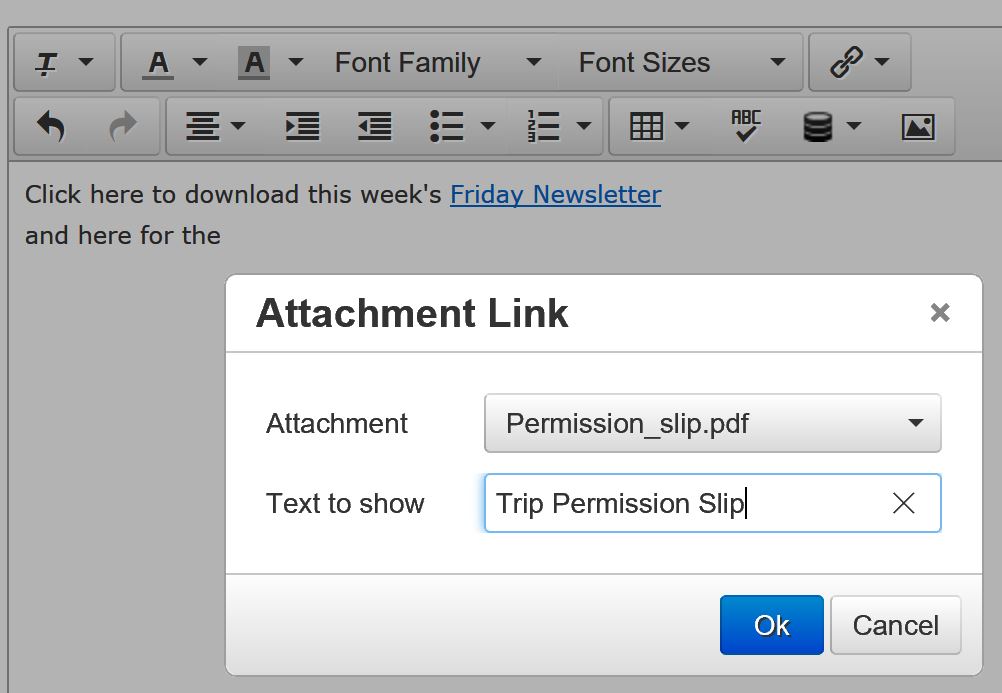
Using links, rather than attaching files to the emails allows larger files to be sent (a total of 10Mb) and saves recipients from having to download attachments to mobile phones until and if they want to. - The text editor allows you to enter your e-mail body. There are various formatting options from the editor menu (please see below). The data field drop down menu allows you to select various mail merge features at the current position in your e-mail.
For example, to personalise the e-mail so it includes the recipient’s first name, select “Recipient Forename”. Before using the parent surname and particularly forename mail merge option, check that your ClarionCall system holds accurate information, thereby avoiding e-mails starting with ‘Dear Mother Smith’.
-
You can Copy and Paste from existing Word or other documents by pressing the CTRL button and the letter V. Please do not right-click and select ‘paste’.
-
As an alternative to paragraph 8 above, you can also send attachment links by clicking on the ‘link’ button and then 'insert link'. You can then either enter a URL or click on the browse button to open the File Manager and browse for your file as required file(s) and click ‘add’.
You can add attachments up to a limit of 10Mb per file. When you have finished adding attachments, click on ‘ok’ and you will be returned to your e-mail message window.Please note, due to various restrictions on file size attachments are added as links within the e-mail itself rather than an actual attachment.
File types accepted are gif, jpg, png, jpeg, pdf, doc, docx, xlsx, xls, txt, rtf and csv.
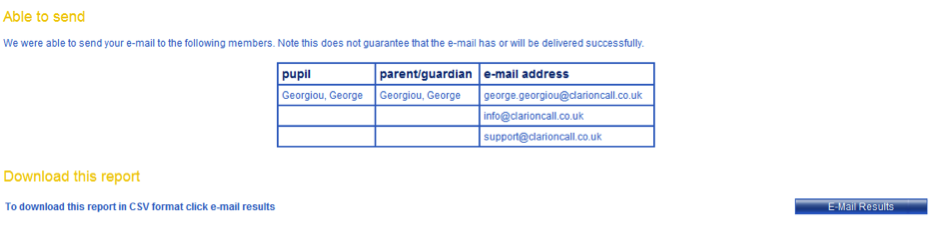
- Click “Send” to send the e-mail.
- The system will display the addresses where an attempt will be made to send the e-mail.