| Click here to view or download a PDF file of this guide. |
| Click here to view a video example of 'How to create a Workflow Form' |
| Click here to view a video example of 'How to build a Workflow Form' |
Workflow forms are created for use in specific applications. For example, a permission form can be created for the Sports Zone, which parents must fill out when their child is selected to play in a sports match.
Forms created in the ‘Workflow’ section of the Form Zone are only available for completion through the applications they are assigned to.
How to create a Workflow Form
1. Ensure you are logged into the Staff Message Centre.
2. Click the ‘Workflow’ panel list item in the ‘Form Zone’ on the Dashboard. The ‘Workflow’ form library page will load.
3. Click ‘+New’. The ‘New Form’ page will load.
4. In the ‘Details’ section, enter the following:
a. The title of the form.
b. The application the form should be assigned to.
c. A description of the form.
d. Select whether an email summary of each submission should be sent to the form’s manager.
e. Select the form’s manager by entering details of a member of staff into the search filed, and clicking search. Click ‘Select Manager’ when the correct manager has been chosen.
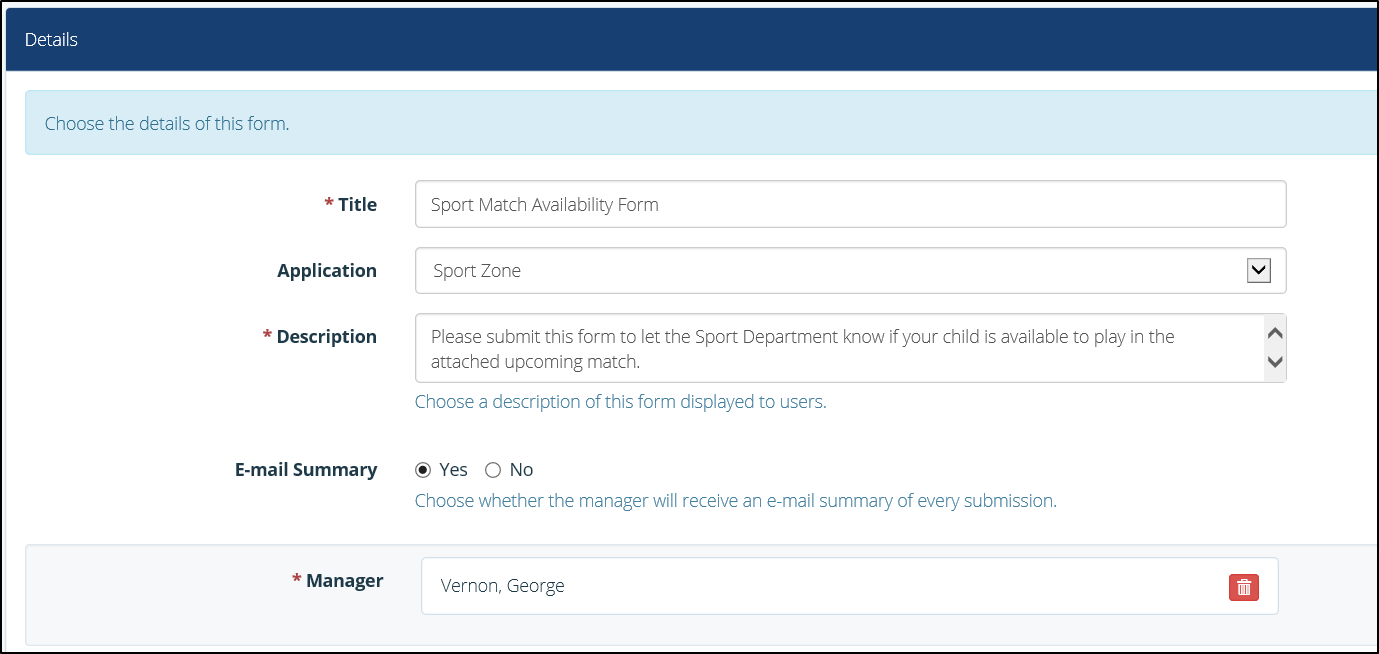
The ‘Workflow’ form ‘New Form’ page
5. Click ‘Submit’ when all details have been correctly entered.
This process will have created the shell of your form. You now will need to ‘build’ the form and create the question fields for users to fill in.
How to build a ‘Workflow’ Form
Once you have completed the basic setup of your ‘Workflow’ form, the page will redirect to the forms ‘Library’ page. If you are returning to the Staff Message Centre to build a form, click the ‘Workflow’ panel list item in the ‘Form Zone’ on the Dashboard.
1. A list of created form titles will display. Click the ‘Build’ icon on the right-hand side.
![]()
The ‘Build’ form icon
2. Forms are made of ‘Components’, which can be selected from the ‘Components’ drop-down menu in the ‘Fields’ section. Form ‘Components’ are divided into the following sections:
a. Text/Headings.
b. Single Column Fields.
c. Multiple Column Fields.
d. Preset Fields.
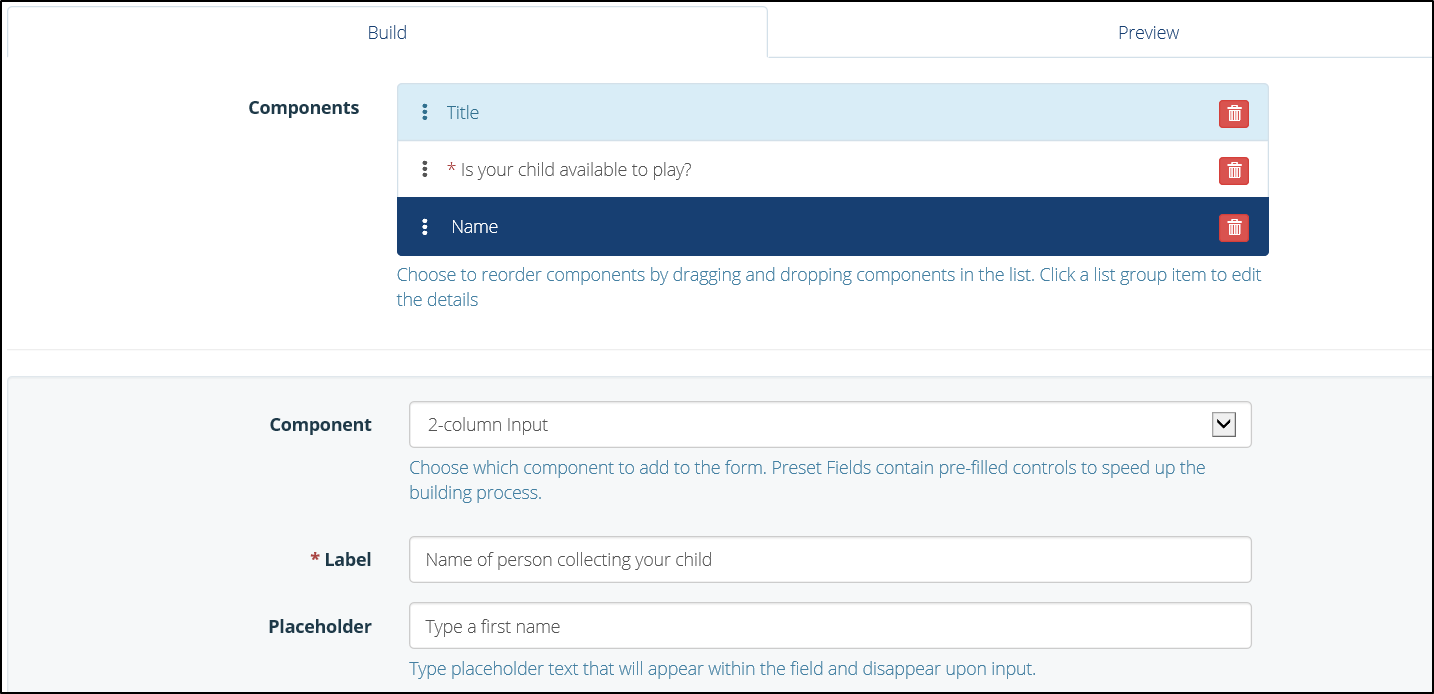
The Build Form 'Components' section
3. Select a ‘Component’ from the drop-down menu, and fill in the necessary fields. Once completed, click ‘Add Component’. Click ‘Save’ when your form components have been added.
4. Scroll down to the ‘Design’ section to alter the look of the form. The form background colour, and text colour can be edited. Click the colour drop symbol to display the colour picker. The ‘Colour Preview’ field will display any changes made to the background and text.
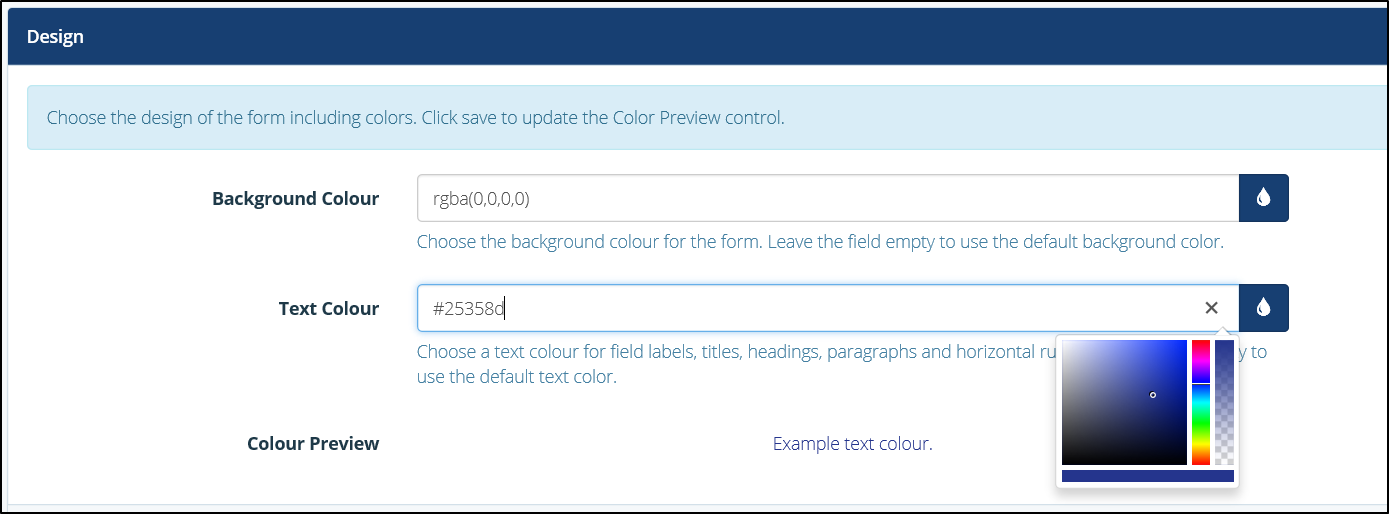
The ‘Design’ section
5. Click ‘Save’ when your form is complete.
How to publish a form
When your form is complete, it will need to be published in order for users to complete and submit their responses.
1. In the ‘Form Zone’, click ‘Library’ within the ‘Workflow’ menu option.
2. Tick the tick-box on the left-hand side of the appropriate form.
3. Click the ‘Bulk’ icon, and click ‘Publish Form’. Your form will now be available in the application you have assigned it to.
Once complete and published, your form will appear in the application you have assigned it to.