| Click here to view or download a PDF file of this guide |
The Diary Zone pulls together pupils non-timetable events created in ClarionCall into one application, creating a centralised record that allows school administrators to see where each child is at any time. Any pupils assigned to Sports Matches, Co-Curricular Clubs, School Events and Parents’ Evenings will display in the Diary Zone, with details of the events they are assigned to.
1. Ensure you are logged into the Staff Message Centre.
2. Click the ‘Diary’ panel list item in Diary Zone on the Dashboard.
Browser Panel
The ‘Browser Panel’ page will load, displaying a list of pupils assigned to Co-Curricular Clubs, Sports Matches, School Events, and Parents’ Evenings on that day. This list of pupils can be reduced or enlarged by using the ‘Filter’ option to set a date range, and/or select which pupil groups should be displayed. Use the Search bar on the right-hand side to search for a particular pupil.
The ‘Edit’ page
1. Click the ‘Edit’ icon on the right-hand side for the appropriate pupil. The ‘Edit Member’ page will load.
![]()
The ‘Edit’ icon
2. All Co-Curricular Clubs, Sports Matches, School Events and Parents’ Evenings the pupil is assigned to; within the date range entered on the ‘Browser Panel’ page, will display under ‘Events’.
3. Add any general comments in the ‘Comment’ box. Any comments saved here will not be posted anywhere, but can be used to save general information.
4. Use the ‘Notes’ section to add notes relating to the child on particular days, e.g. ‘1/7/16-2/7/16 – Joseph is leaving at 17:00 today’.

An example of a Diary Zone ‘Note’
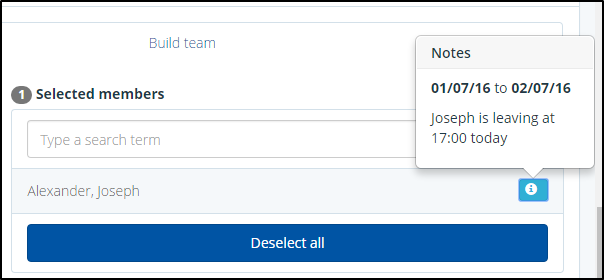
5. Any notes saved within this page will display if staff try to assign the pupil to an event on that day, in the form of a notification badge.

A Diary Zone ‘Note’ displaying in the Sports Zone
The ‘View Profile’ page
1. In the 'Browser Page', click the ‘More Info’ icon on the right-hand side for the appropriate pupil. The ‘View Profile’ page will load.
2. In the ‘Summary’ section, the number of events the pupil is assigned to over the date range selected in the ‘Browser’ page will display. The ‘Events’ section will display details of all events the pupil is assigned to over the data range selected.
Events
The ‘Events’ tab displays all events taking place within the date range set in the ‘Filter’ option, staff members can use this tab to update an event’s Roll Call, or to export details of the event.
How to update a Roll Call
1. To update a Roll Call, click the ‘Roll Call’ icon on the right-hand side for the appropriate event to load the ‘Edit Roll Call’ page.
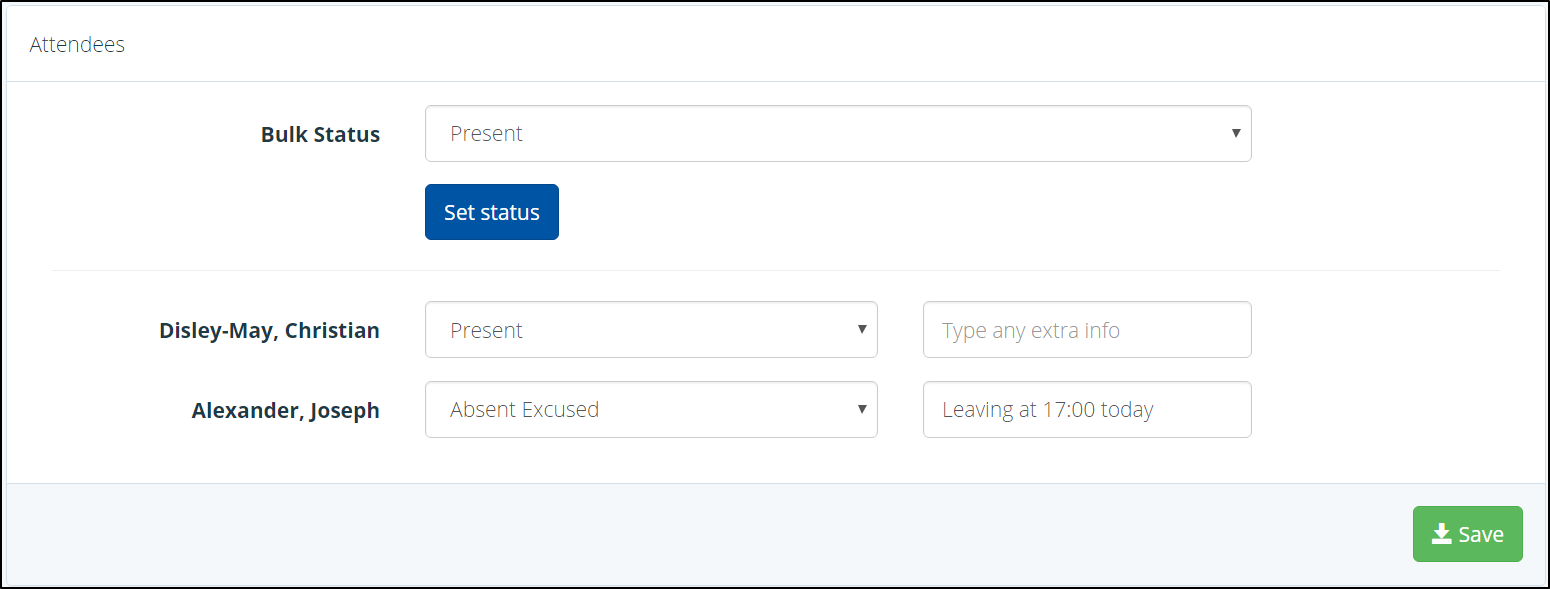
a. The ‘Details’ section contains the event’s information. The ‘Attendees’ section contains pupils assigned to the event, and options to set their Roll Call status.
b. In the ‘Attendees’ section, use the ‘Bulk Status’ drop-down menu option to set all pupils status as either ‘Present’, ‘Absent Excused’, or ‘Absent Unexcused’. Select the option required and click ‘Set Status’.
c. To set the Roll Call status on an individual pupil basis, use the drop-down menu next to their name and select the applicable status option. Type any extra notes or information for the pupil into the additional field, next to the drop-down menu.
d. Click ‘Save’ once you have updated any pupil’s status.

The Attendees section ‘Roll Call’ update option
2. To export the details of the event, including any Roll Call updates, click the ‘Export’ icon.
Export
The ‘Export’ tab allows all events within a defined date range to be exported into a spreadsheet.
1. In the ‘Fields’ section, select which data fields you want to export (they will all be selected as the default’, and type an alias for any if necessary.
2. In the ‘Controls’ section, select the date range you wish to export. Select the pupil groups to export as necessary. A data range must be inputted to successfully create a data export.
3. Select the file format you wish your export to be created in.
4. Click ‘Export’ to create your export file.