| Click here to view or download a PDF file of this guide |
Circumstances may arise in which an entire fixture’s details need to be edited, rather than those of an individual match. Use the ‘Edit Fixture’ option to create additional matches under the same fixture, edit the type of fixture and change the fixture’s location.
1. Ensure you are logged into the Staff Message Centre.
2. Click ‘Fixtures’ in the Sport Zone.
3. Find the appropriate fixture, click the ‘Options’ button on the right-hand side, and click ‘Edit Fixture’.
4. In the ‘Details’ section, edit the type of match using the drop-down menu, select the ‘Multiple Opposition’ option if playing against multiple opposition, and change the opposition by deleting the current opponent, and then using the ‘Opposition’ search bar to find the replacement.
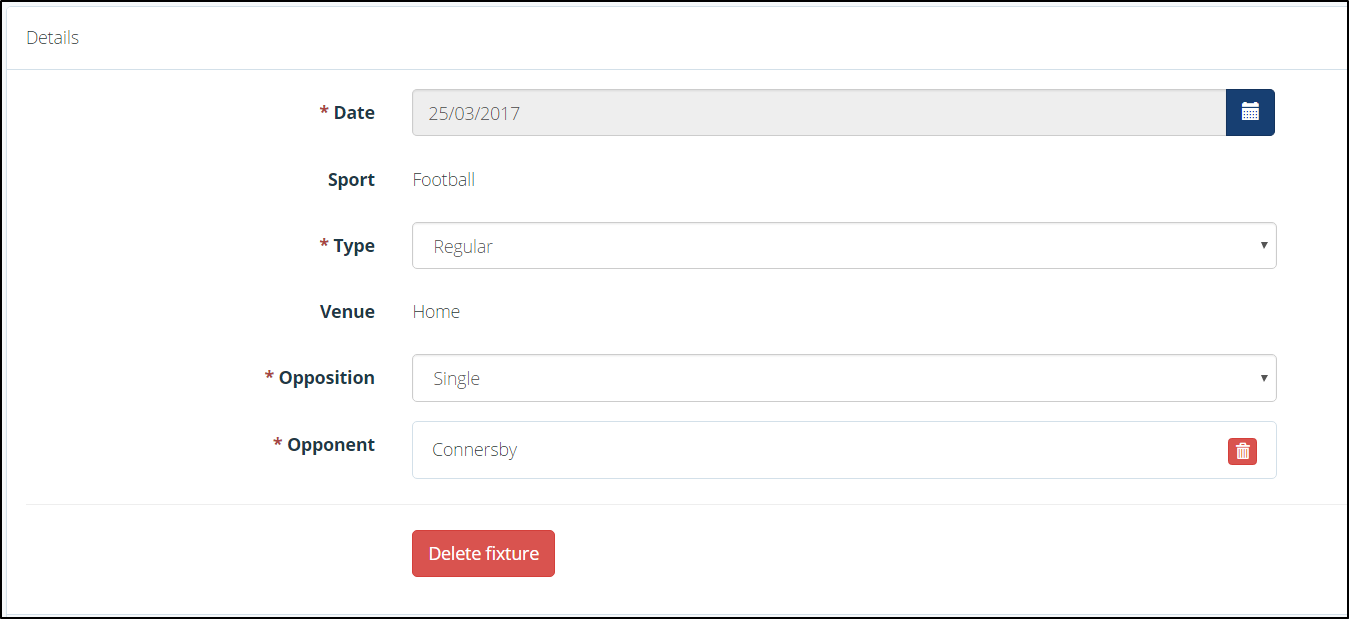
5. Click ‘Save’ after making any changes.
6. Add additional matches to the fixture in the ‘Matches’ section. Use the drop-down to choose a team, select a start and end time and click ‘Add Match’.
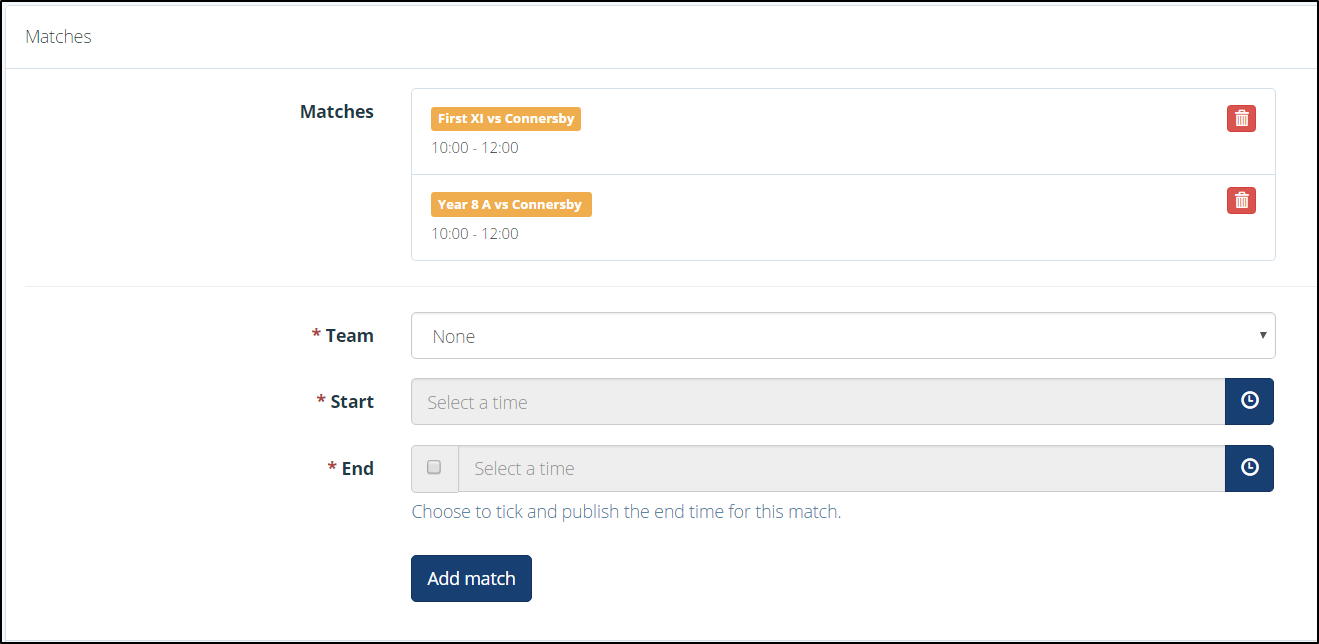
7. Click ‘Save’ after making any changes.
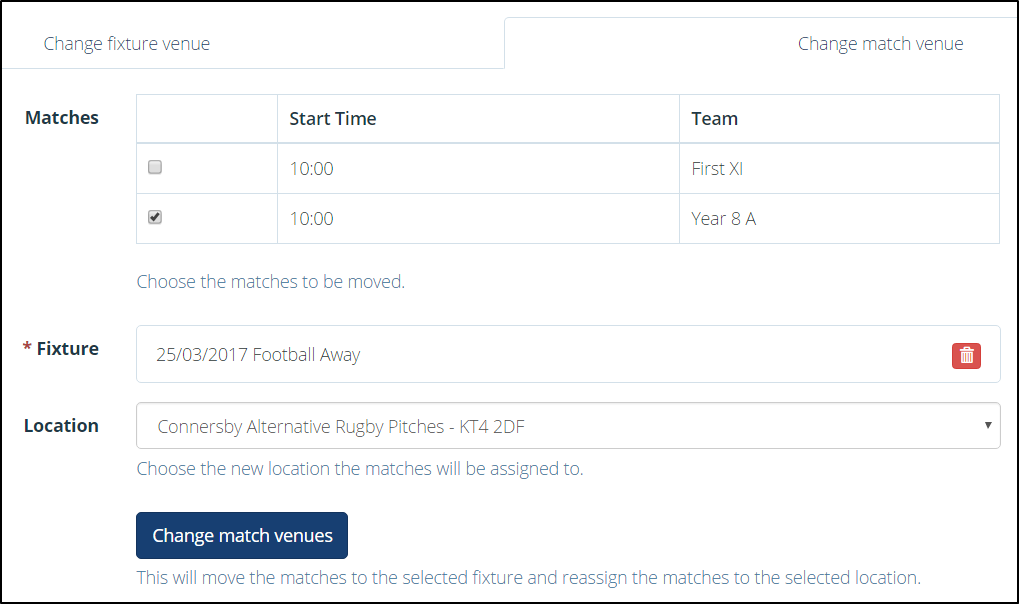
8. Change the Fixture and Match venue in the ‘Venue’ section.
a. Use the ‘Change Fixture Venue’ tab to edit the location of an entire fixture. (Click here to view a help guide on how to setup additional venues). Use the ‘Locations’ drop-down menu to select another venue, and click ‘Change Fixture Venues’.
b. Use the ‘Change Match Venue’ tab to edit the location if an individual match. Tick the relevant match, search for a fixture to assign a match to (Click here to view a help guide on how to create a fixture), select an alternative location for the match if required, and click ‘Change Match Venues.
9. Click ‘Save’ after making any changes.