| Click here to view or download a PDF file of this guide | Click here to view a video example of this guide |
Planner
1. Ensure you are logged in to the ‘Staff Message Centre’.
2. Click ‘Planner’ in the Event Zone on the Dashboard
3. Click the ‘Options’ button for the appropriate event, and click ‘Edit’.
4. In the ‘Details’ section, edit the category, title and description as required, or change the date and time of the event. Click ‘Save’ after making any changes.
5. Scroll down to the ‘Attendees’ section to add pupils who are taking part in the event.
a. Use the filter drop-down menus to select the appropriate school group and click ‘Filter’.
b. Select individual pupils by clicking their name, alternatively, scroll down and click ‘Select all’. This will move them over to ‘Selected members’.
c. After selecting the necessary pupils, scroll down and click ‘Save’.
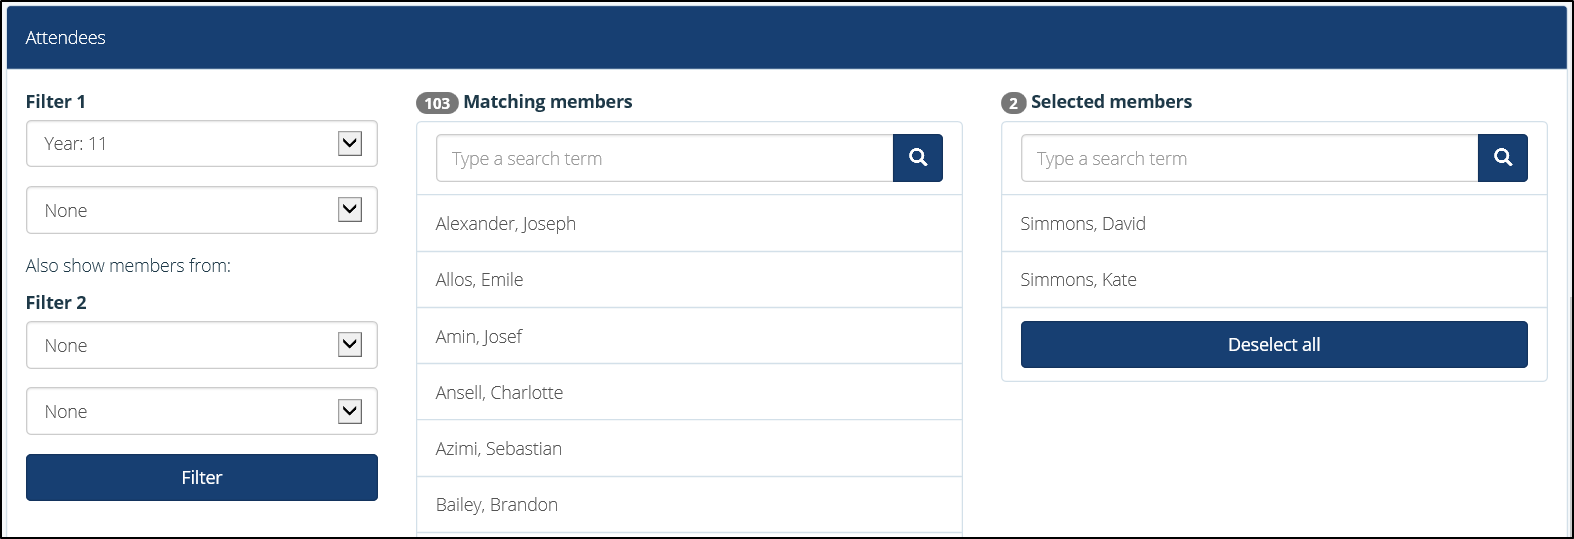
The Event attendee filter option
6. Use the facilities section to add catering, transport, estate or resource requirements to the event. It may be wise to set events requiring a large number of facilities to a ‘manual’ publication approval setting, to ensure these are all approved for the event.
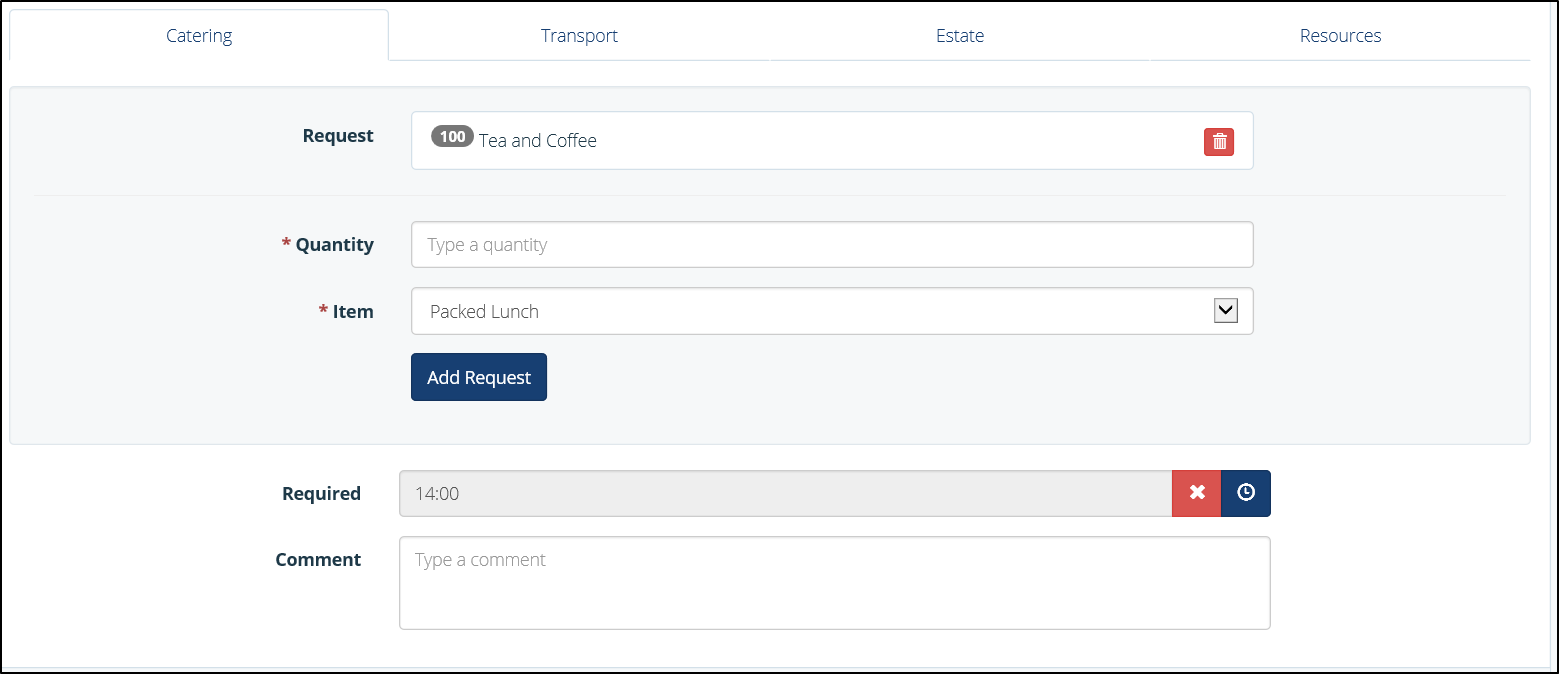
The Facilities section
7. After selecting all the necessary Facilities, click ‘Save’.
Approval
1. If your event requires manually approving, click the ‘Approval’ tab on the left hand menu. This will display all events awaiting approval for publication.
2. To manually approve an event for publication, tick the tick-box next to the event, click ‘Bulk’ and click either 1) Mark as Draft, 2) Mark as Pending, 3) Mark as Approved, or 4) Mark as Cancelled. These can be selected as and when necessary, so an event can be pending approval from all parties before being fully approved.
3. Click ‘Browser’ to view all school events in a ‘week view’, enabling a quick view for administrators to see which events require approval.
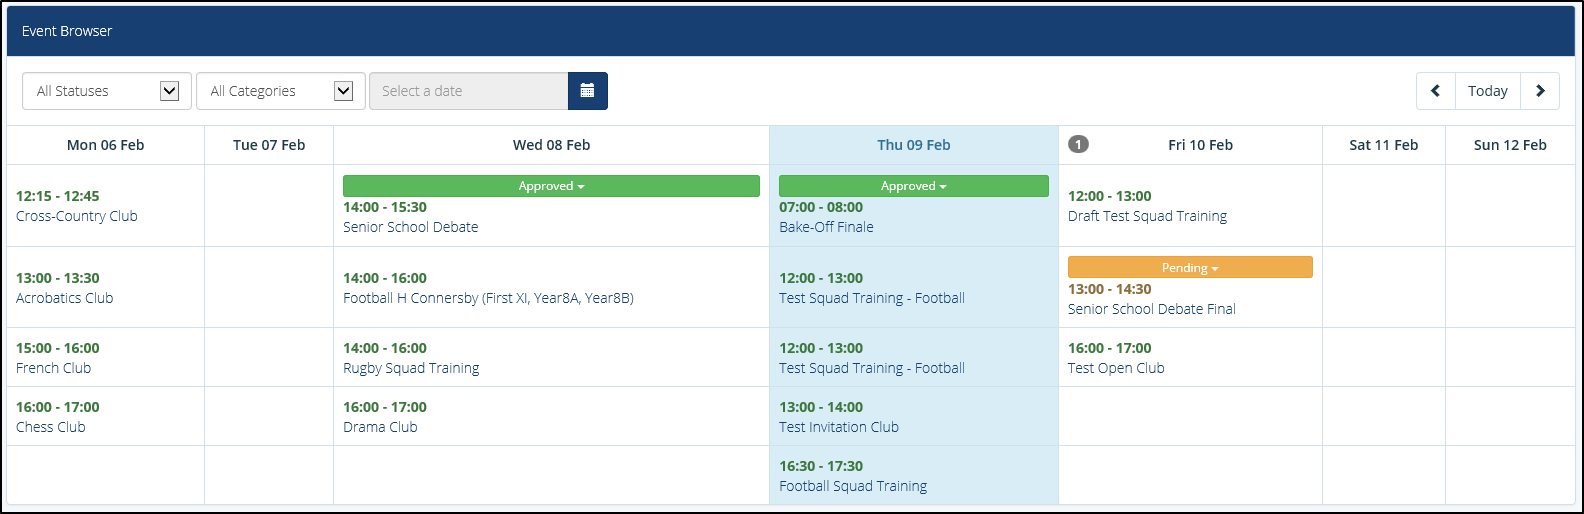
The Event ‘Browser’