| Click here to view or download a PDF file of this guide | Click here to view a video example of this guide |
Calendar event categories can be set to require manual approval before they are published to the Calendar for members to view. The ‘approval’ process gives administrators control over the publication of events, allowing them to check that the event’s details are accurate before it is displayed on the Calendar. For information on how to create a new event, click here.
1. Ensure you are logged into the Staff Message Centre.
2. Click ‘Approval’ in the Event Zone on the Dashboard.
3. There are two ways to update an event’s approval status, through the ‘Waiting List’ page or through the ‘Browser’ page.
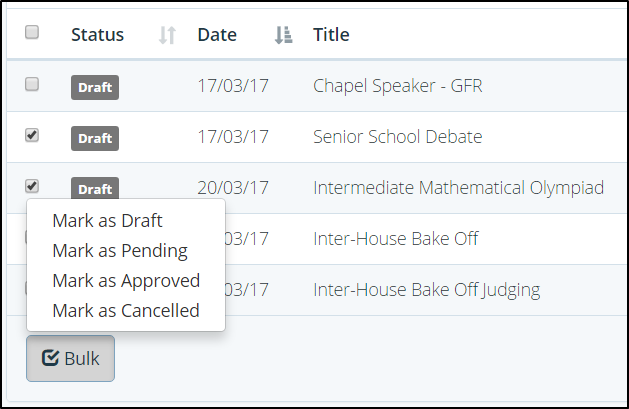
a. Waiting List – Events awaiting approval will display in grey with a ‘Draft’ status.
i. Click ‘Options’ and ‘Edit Approval’ to view the event’s details; change its Category or edit its title. Click ‘Close’ to return to the Waiting List page.
ii. Tick the tick-box next the event requiring approval, click ‘Bulk’ and select the appropriate status to mark the event with.
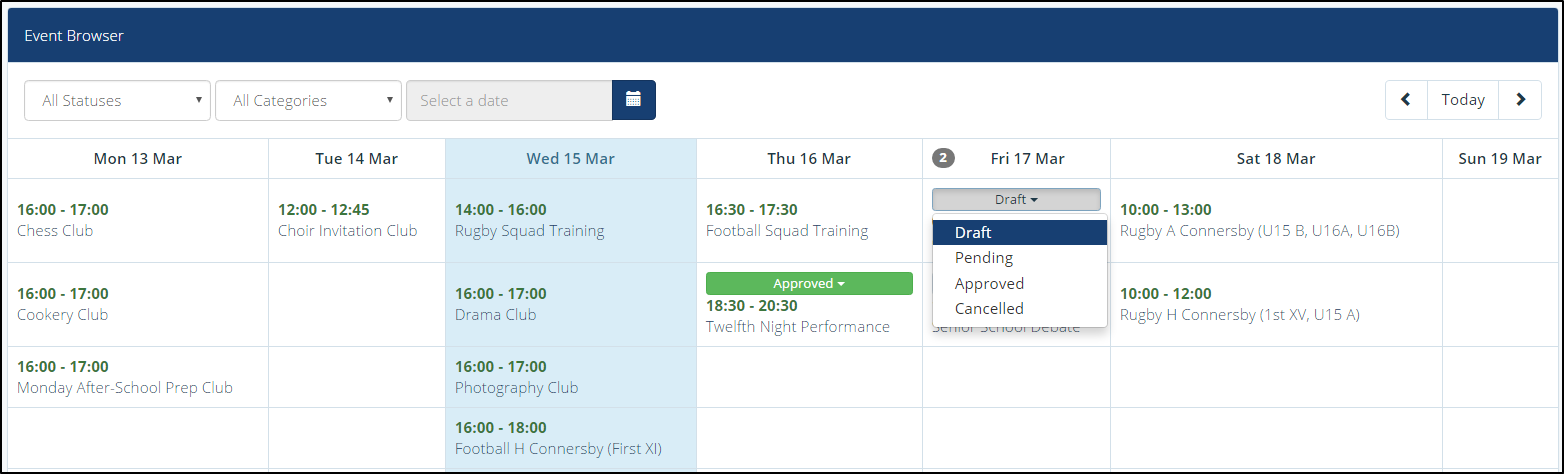
b. Browser – The ‘Browser’ page displays events in a Calendar view, which can be filtered according to status or category.
i. Events requiring approval will display with a drop-down above them. Click the drop-down and select the appropriate option to edit the event’s approval status.
4. Once an event is set to ‘Approved’, it will display on the Calendar for members to view.